
After creating a free blog in blogger, we need to install a theme on our blog. A well-customized theme not only looks good but also play a vital role in attracting more visitors.
In this post, I am going to share a step by step guide on how to add custom theme in Blogger.
If you are new to Blogger, then make sure to add 5 to 10 blog posts before uploading a custom theme. It is so because, an empty blog might not look great with a custom theme.
In order to fully customize your theme, I recommend uploading 5 to 10 blog posts before adding a new theme. In case if you don’t know how to write a blog post on Blogger, you can check out the my recent post on blogger post editor.
Table of Contents
Step by Step Guide to Add Custom Theme in Blogger
Adding a custom theme in Blogspot is easy. All you need to do is to follow the instructions in this post. Here is a Step by Step guide on how to do that:
Step 1: Download a Custom theme for your Blog
Before adding a custom theme to your blog, you need a responsive Blogspot theme. There are thousands of free theme available over the internet. Here is a list of top 5 sites from where you can easily download a free or premium theme for your blog:
- Goyaabi Templates
- Sora Templates
- Premium Blogger Templates
- Templateclue
- ThemeForest (for premium themes)
After downloading any of the free themes, you will get a .zip file. You need to extract the zip file (See Step 2)
Step 2: Extract the zip File
Blogger does not support zip files. If you want to upload any custom theme in Blogspot, then you have to extract the zip file and upload a .xml file in blogger.
You can easily extract a zip file from the pc. If you don’t have a personal computer/ laptop, then you can extract zip files online. Simply click on below link to extract any zip file online:
Click here to extract any zip file
After you click on the above link, you will be asked to upload the ZIP file. You can simply upload the zip file & uncompress it.

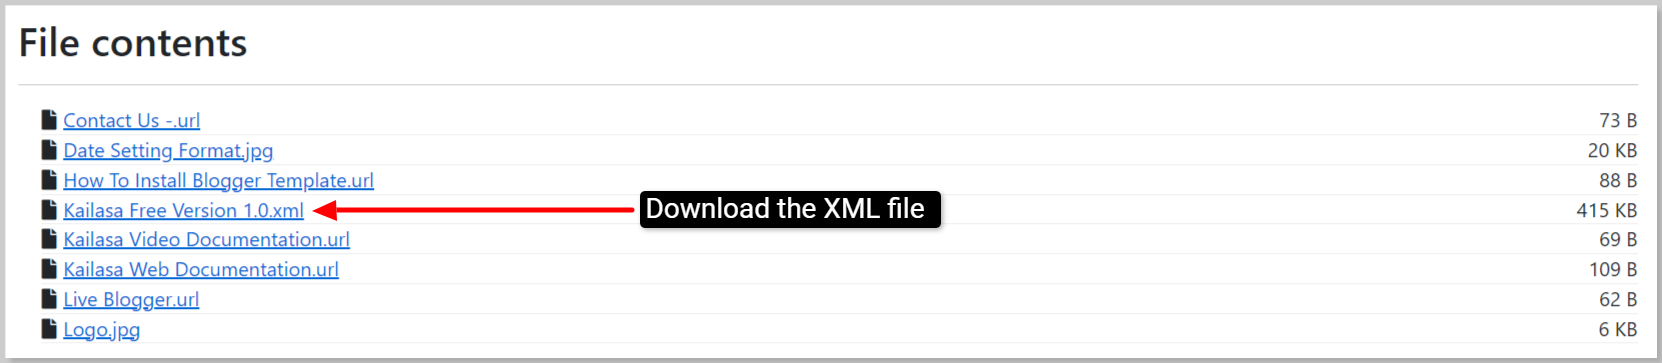
After extracting the zip file, download the .xml file from the extract.
Step 3: Blogger >> Themes >> Select Menu
Now log in to your blogger dashboard and go to the following settings: Blogger >> Themes >> Select Menu.

Step 4: Backup / Change theme
I recommend you to backup the theme before uploading a new one. There are many reasons for which you need to backup the old theme. Suppose you don’t like the new theme, then you can easily upload the old theme If you back up.
Click on the Download theme to backup your previous theme. After you download your previous theme, Click on Choose File to Select XML theme file from your computer.

Step 5: Upload the new theme
After choosing a theme from your computer, Click on Upload to install it on your blog. After that, the popup will be closed & new theme will be installed to your blog.

Step 6: View your Blog
After installing the custom theme for your blog, Click on View Now to see your Blog. If you wish to upload the old theme then you can simply upload XML file of your old theme to Backup/Restore.

CHEERS! SETUP FINISHED.
YOU’VE SUCCESSFULLY INSTALL CUSTOM THEME IN BLOGGER!
In this way, you can easily install a custom theme in the Blogspot blog.
See Also:
- HTML Basics every blogger should know!
- Beginners guide to Blogger post editor
- Setup Bigrock custom Domain in Blogger: A Beginner’s Guide
- How to get a Free Domain name for your Blog?
- Add PayPal Donate Button to Blogger & make supplementary income
- How to Setup Google Analytics on Blogger? (with pictures)
- Add Meta Tags to Individual Blogger posts – & Boost your SEO by 200%
Conclusion:
In this post, I have explained steps to install a custom theme in Blogger.
You can easily install a custom theme on your blog using the above tutorial.
Don’t panic if your theme looks different from the demo theme. You need to customize your theme.
In my next tutorial, I will discuss Steps to customize the custom theme in Blogger. Have any suggestions, queries or feedback, drop your thoughts in below comment box.


I will be saving this as I want a different theme for my website. Good to know that I can do this in Blogger.
This is a great write up! I have been thinking about starting another blog and would want to use blogger. Now I can customize it too! Thanks!
Hi Harish thanks for sharing and I’m already save your blog on how can I customize my theme in my blog thank you!
This is one of the things I love about wordpress, there are thousands of themes to choose from. This is great that this option is also available for blogger. Thanks for sharing!
What a great tutorial! I wish I had read this in my early month of blogging!
This will really help all those in blogger.
You made me miss my initial blogging days.
Great info! I will definitely pass it along 🙂 very thorough write up !
I have a friend who like to start her own blog. I know this will help her. Will send this to her.
This is really helpful. There are many bloggers who are not tech savvy, including me.^_^
As a blogger, I really appreciate your tips. Having a custom, unique look can set us apart from each other, so I’m going to bookmark this!
Thank you for these helpful blogging tips!
This post was nostalgic. Brought back memories of me using blogger o many years ago.
Although I don’t use Blogger, I know those who do and I will forward on these tips to them as I believe they had a few issues with this when they first started! Thanks!
This is such a great tutorial for those in blogger. I never would have figured that out in my own.
Great tutorial. It worked like a charm — thanks for sharing this!
Thanks Fatima for your valuable comment.