
Are you using default blogger themes for your Blogspot blog? If yes, then you might have tried removing the footer credit “Powered by Blogger” from your blog.
Well, it is not that straight forward. You have to deal with some sort of code in order to remove it. And, I am here an ultimate guide on how to remove “Powered by Blogger” from your blog footer.
In this post, we will learn:
- Why you should remove default footer credit from your Blogger blog?
- How to do it &
- About adding custom footer credit like “©fulltechhelp 2020 • All Rights Reserved“.
This post is only for those using default blogger themes. I will also post a detailed tutorial for bloggers using custom themes.
Table of Contents
Why You Should Remove Default Blogger Footer Credit?
The look and feel of your blog play a major role in the acquisition of visitors. Visitors will only stay on your blog if you are providing a good user experience.
A clean & user-friendly blog attracts returning visitors & is very important for the growth of your blog. There are several benefits of removing default footer credit from Blogger. Few of them are:
- You can make your blog look more professional by adding your own footer credit instead of Blogger. The credit “©yourblog 2020 • All Rights Reserved” looks way better than “Powered by Blogger“.
- By using the default footer credit, you are giving an outbound link that may redirect visitors away from your blog.
- You can use this place to show Copyright information & country of origin like “Made with ❤️ in New Zealand“.
- Using custom footer credit builds trust among your users & also leads to consistent readers.
These are some of the top reasons why you should remove powered by Blogger from your Blogspot blog. I think now we are ready to start our step-by-step guide on removing footer credit.
Let’s dive right in!
How to Remove Powered by Blogger from Your Blogspot Blog?
There are two ways by which you can remove Powered by Blogger from your Blogspot blog. I have discussed both of them below. If one method doesn’t work, try another.
Method 1: By Editing Theme HTML
In this method, we have to deal with the code of the theme. It may seem difficult, but our step-by-step guide will help you ace this in the easiest possible way.
Follow the below steps & replicate the process:
Step 1: Backup your Blog
It is a good practice to always back up your Blogspot blog before making changes to its HTML. Doing so can help you get your blog back in case the change you have made cause any critical issue.
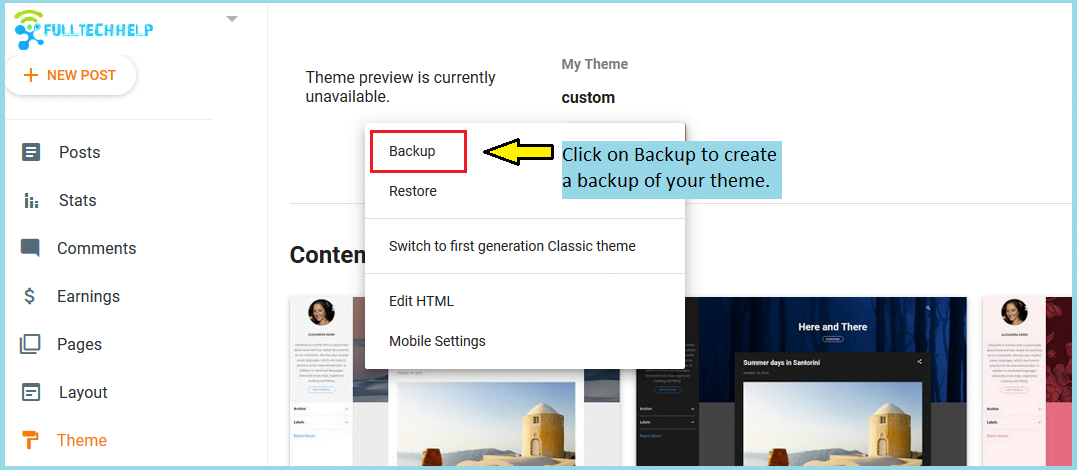
For making a backup of your Blogspot theme, you have to visit the Theme section in your Blogger dashboard.

There, you will see a CUSTOMIZE button along with a drop-down. All you have to do is to click the drop-down. After you click on it, a menu bar will appear in front of you. Select Backup from the list.
Next, a pop-up will appear where you have to click on Download & the backup of your theme will start downloading on your device.
This is how you can create a backup of your Blogspot theme. Similarly, if you want to restore your downloaded theme, then you have to click on Restore & there you will find an upload button. This way you can restore your theme.
Let us now move to our second step, i.e. Editing your theme’s HTML file.
Step 2: Edit your Theme HTML
In the same interface (as of Step 1), you will find the EDIT HTML option. You can take the help of the below snapshot in pointing it.
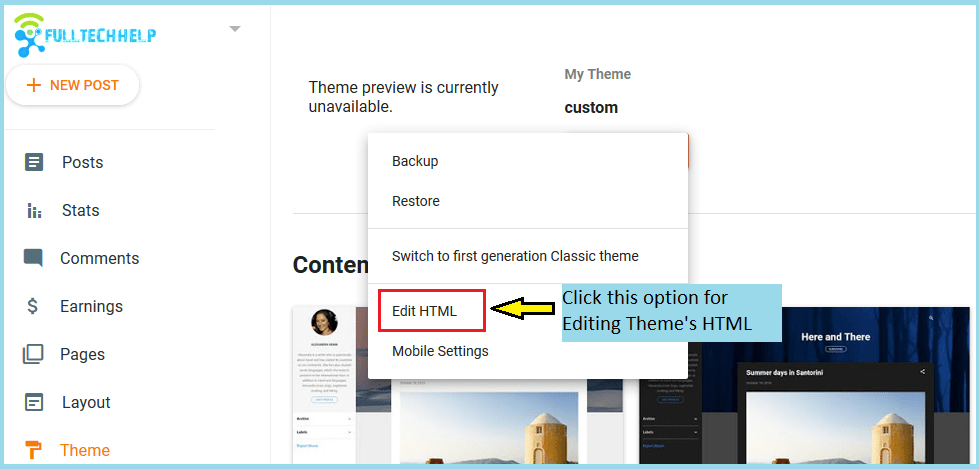
After you hit that link, a new interface will open where all the code of your blog is present. Here you have to click on the Widgets icon present at the right-hand side.
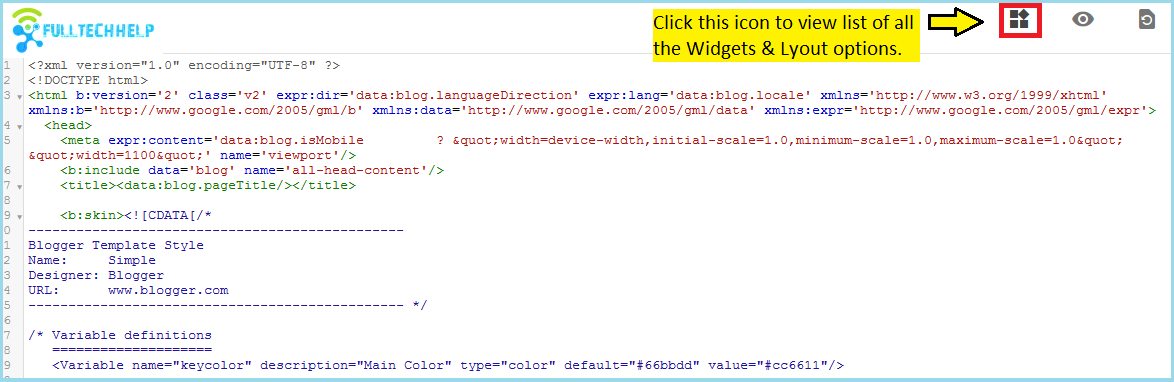
As you click on this icon, a new interface will appear where you can find all Layout options. Clicking on any Layout option will send you to its respective code.
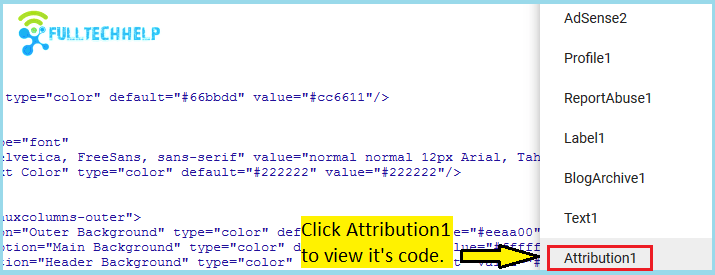
Since we need to remove the footer attribution of our blog, so we have to click on the Attribution1 option. Here is how the options look.
After you hit the Attribution1 option, you will be redirected to a completely new set of code. Here’s how it looks:

Just change ‘true’ to ‘false’ & that’s it. After making the changes make sure to save the HTML code.
As long as the lock is on, you can’t remove the footer credit. But just after turning it off (using the false tag), you will be able to remove the attribution widget.
This is how we have made changes to our Theme’s HTML. Now, we have to remove the Attribution widget by visiting the Layout Section of our dashboard. Let’s see it in the 3rd step.
Step 3: Removing the Attribution Widget
In the last step, you have to visit the Layout section in your Blogger dashboard. After scrolling a bit, you will find the Attribution Widget of your theme.
Here’s how it looks:
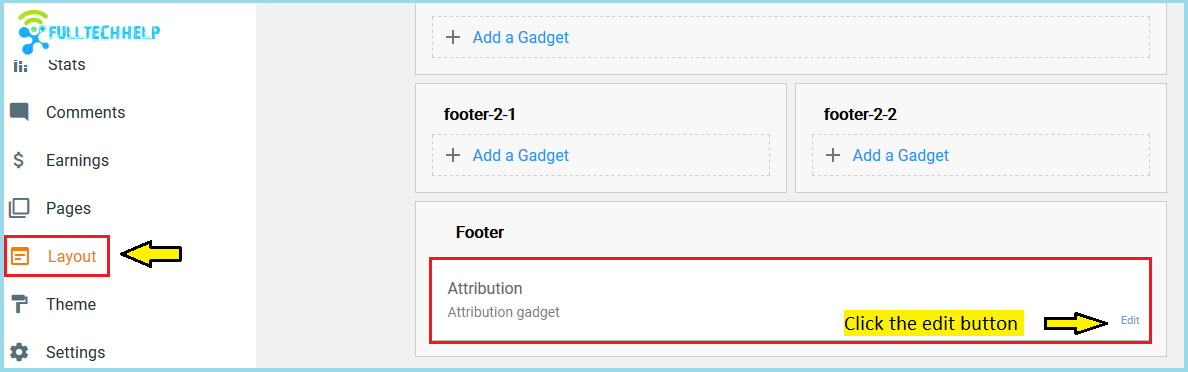
Here you have to click on Edit & remove the widget.
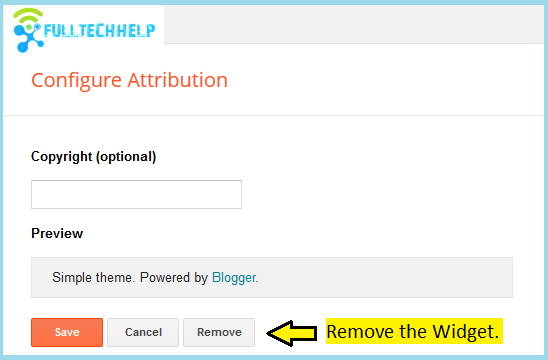
After removing the widget, save the Layout section & visit your blog & check weather the footer credit is removed or not. For most users, this method works perfectly. If the footer credit is still there, I suggest following the second method.
Method 2: Using Theme Customizer
The second method is quite simple compared to the first one. In this method, I will share an easy to follow guide on how to remove powered by Blogger using CSS.
Follow the below steps:
Step 1: Visit Customizer in your Blogger Dashboard
In your Blogger dashboard visit the Theme section. Click on the CUSTOMIZE button shown alongside the installed theme. The below screenshot can help you find it on your dashboard.
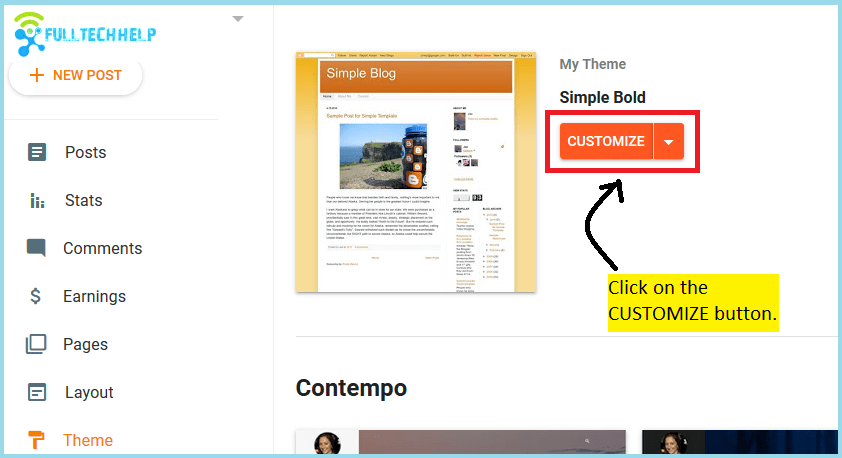
After you click the CUSTOMIZE button, you will be redirected to Blogspot Customizer. Under the Advance section, you will find the ADD CSS option. Just click on it & follow the second step.

Step 2: Add CSS Code & Done!
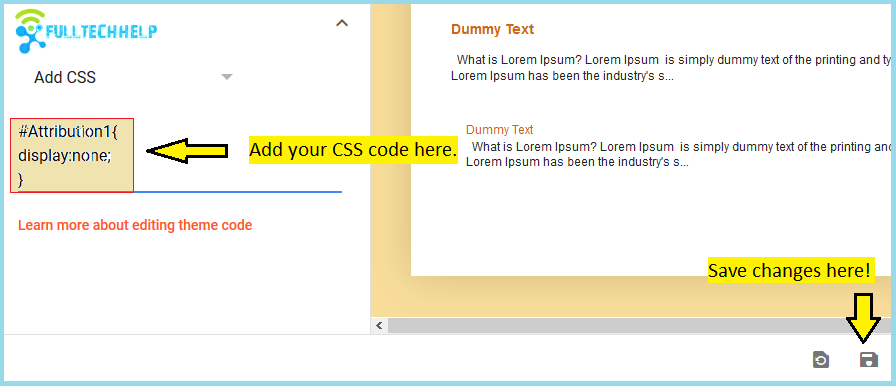
Finally, in the last step, you have to add the following CSS code in the ADD CSS box. And, just after doing so, the default footer credit will be removed from your blog.
CSS Code:
#Attribution1{

display: none;

}
The below image depicts how I have added the CSS code in this section. Follow the same steps & at last, don’t forget to save your edits.
Finally, you can visit your blog.
The footer credit is now completely removed!!
The next task is to add custom footer credit.
How to add Custom Footer Credit?
Now since we have removed the default footer credit from our Blogspot blog, its time to add custom footer credit to our blog.
It might be something like “©yourblog 2020 • All Rights Reserved” or “Made with ❤️ in Your Country“. Below is the step-by-step guide on how to do it.
Step 1: Visit the Layout section in your Blogger dashboard & add an HTML/Javascript gadget in any footer widget area. Here’s how you can add this gadget.
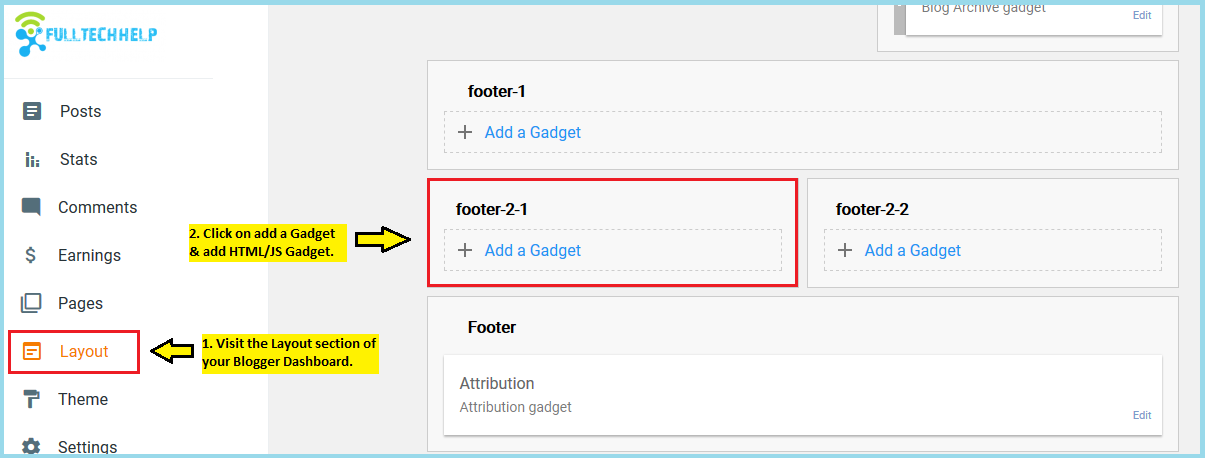
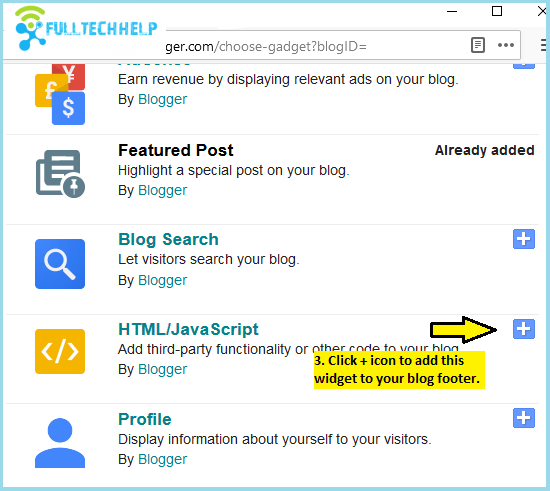
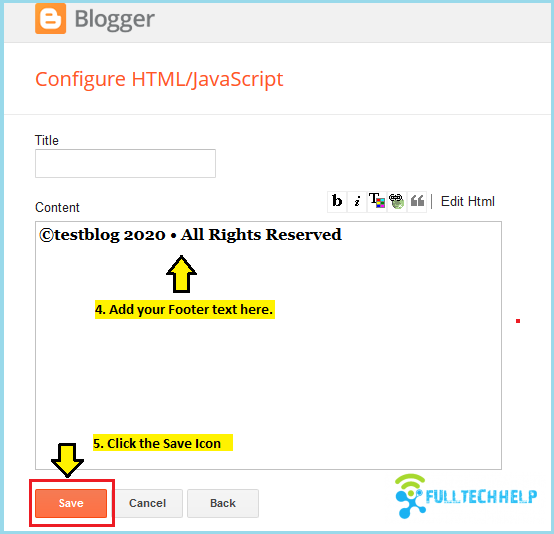
After you click on Add a Gadget, a different window will appear in front of you. Follow the instructions given in the below screenshots to add an HTML/Js gadget.
Congrats, you have won almost 99% of the battle!! Let’s see what’s in the next step.
Step 2: Just drag the gadget that you have added & drop it in the footer credit area. Sounds difficult? No problem follow the below GIF.
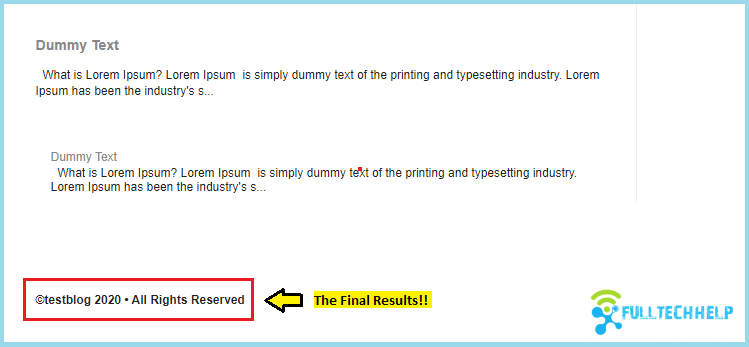
Here is how your blog looks after adding custom footer credit.
I hope you have completed all the steps without facing any issue. Still, if you have any queries, I welcome everyone to leave a comment below this post.
Conclusion
In this post, I have shared two ways in which you can remove powered by Blogger from your blog footer. If one doesn’t work for you, try another.
Along with that, I have also discussed the benefits of custom footer credit & how to add one like “©yourblog 2020 • All Rights Reserved”.
I hope you have found this detailed guide helpful. You can appreciate my efforts by sharing this post with your blogger friends & leave a comment below this post!